
Sherpi
The quiet layer that turns every employee into an AI power user. Set up once for the whole team — skills, context, and tools, ready from the moment they log in.
Get started
Paste this prompt into your AI agent to set up automatically.
Install the CLI
npm install -g @sherpi/cliSign in
sherpi loginOpens your browser. Creates your account and organization if this is your first time.
Configure your editor
sherpi setup --editor claudeReplace claude with your editor: claude, cursor, codex, windsurf, copilot, or gemini.
This installs Sherpi context into your editor so your AI agent knows how to use it.
You're set up. Restart your editor session and Sherpi is ready to use.
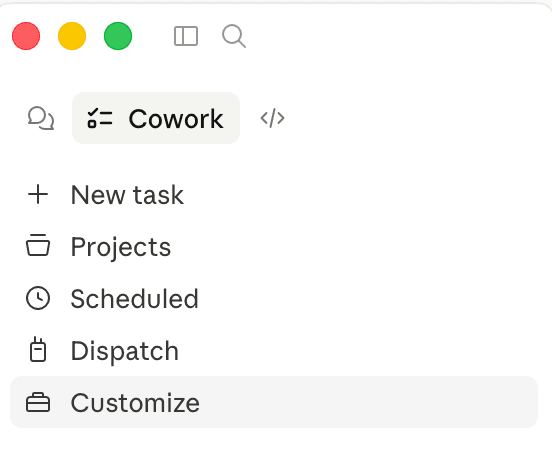
Upload to Claude Desktop
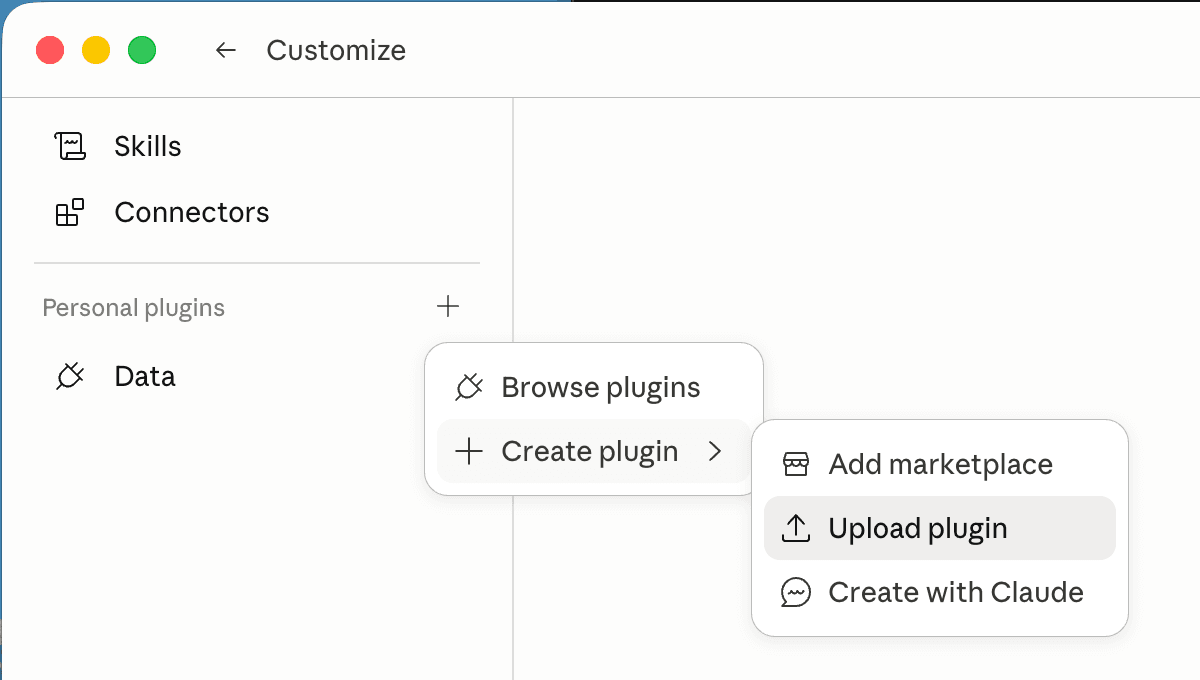
Open Claude Desktop → click Customize in the bottom-left sidebar.
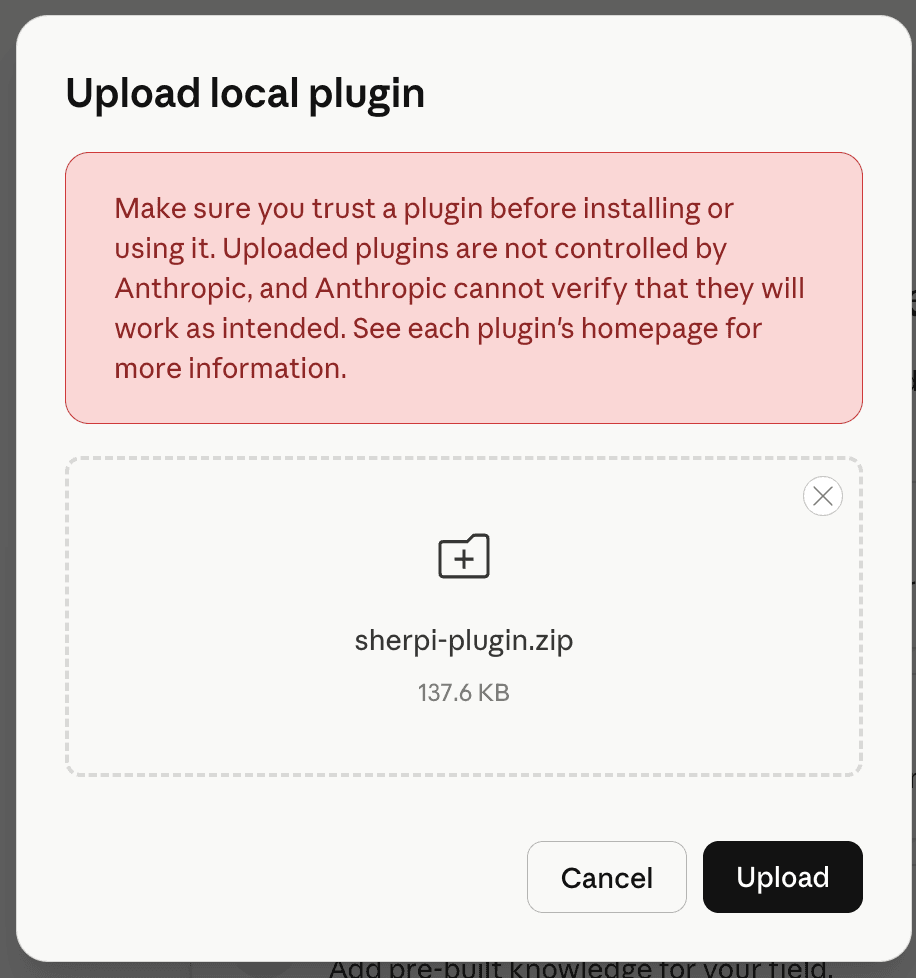
Click + next to "Personal plugins" → Create plugin → Upload plugin. Select the downloaded file and click Upload.
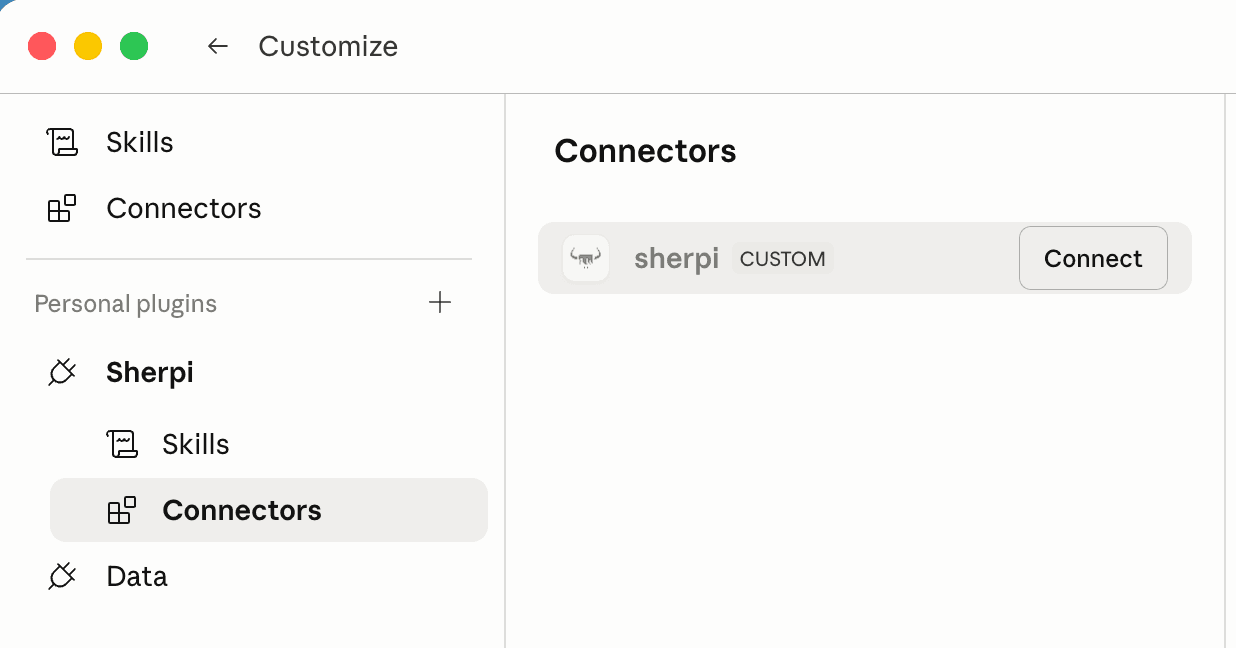
Connect your account
After uploading, click Sherpi in the sidebar → Connectors → Connect. Complete the login in the browser popup.
Start using it
Open a new Cowork session and type /sherpi-get-started, or ask:
- "What skills are available on Sherpi?"
- "Search Sherpi for invoice skills"
- "Install the pdf skill from Sherpi"

The agent handles authentication automatically each session.